Showing posts with label 3D projects. Show all posts

14 May 2015

Postage Stamp Punch Framed Art


It's been a while since I made one of these little squares of goodness.  This piece has gone to my MIL for her special birthday, and I wanted to incorporate elements that reflected her interests - and her favourite colour: BLUE! These 16 elements are mounted on dimensionals over a stamped wooden background in an 8"x 8" frame.

Background:  I stamped multiple images of our Hardwood background stamp in Crumb Cake onto Whisper White cardstock, then cut strips 1/2" wide to piece together the wood background so it extended to cover the full 8x8" background.  The grain detailing is so forgiving, and I laid the strips like floorboards so the joins weren't all in the same spot.

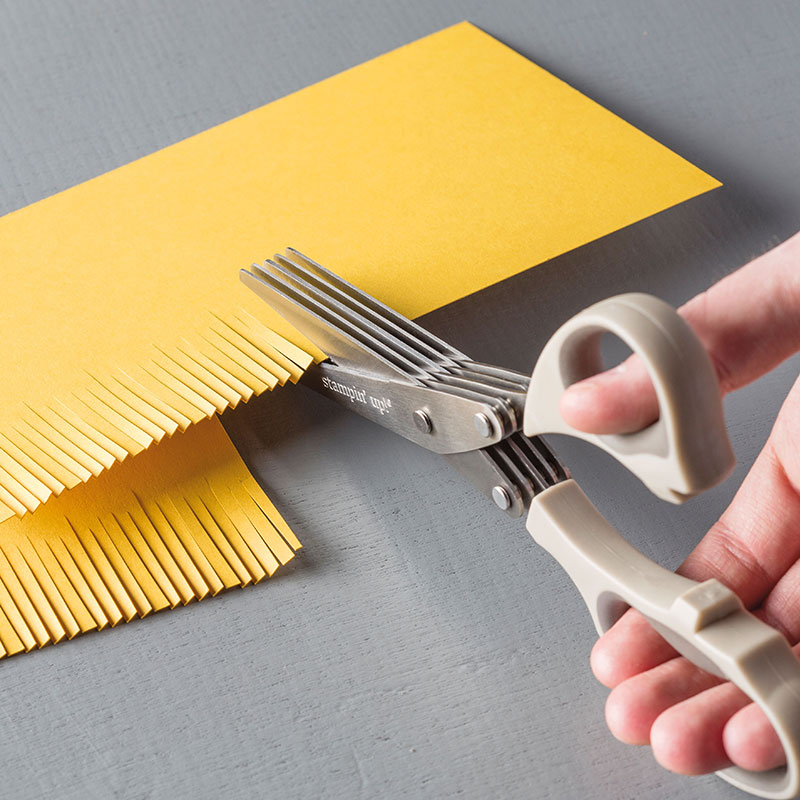
Punches:  I used the Postage Stamp punch (only available till June 2nd, or until sold out as it is 50% off on the retiring list) and also the 1" square punch for each square.  The heart punch is our Sweetheart punch.  I also used the Elegant Butterfly and Bitty Butterfly punches (can you guess where?), as well as the Bird Builder punch and Petite Petals punch for the flower.  The hot air balloon and bunting were hand cut and the monogrammed "R" was cut using the Perfect Print Alphabet Bigz die (also 50% off on the retiring list until June 2nd).

Stamps L-R: Hardwood background, Collage Curios (retired NLA), By the Tide, Choose Happiness, Butterfly Basics, Postage Due (NLA), Papillon Potpourri, Groovy Love, By the Tide, Collage Curios (retired NLA), Choose Happiness, By the Tide, Collage Curios (retired NLA), Petite Petals, Alphabet rotary stamp, Postage Due (NLA), Celebrate Today

Cardstock:  Whisper White, Marina Mist, Island Indigo, Night of Navy, Vellum cardstock
Ink:  Crumb Cake, Marina Mist, Island Indigo, Night of Navy, Real Red

Acc:  Adhesive pearls, dimensionals, linen thread, wooden embellishments (retiring), glitter, candy dot brad base, small heart punch (from Itty Bitty Accents punch pack)

All of the items used are Stampin' Up, lots are on the retiring list only available for a few more weeks, so if you see anything you like, purchase it via my online store or contact me to place an order.

Happy Stamping,

14 October 2014

Groovy Love Pop Up Slider Card


My lovely friend Tanya created a lovely slider pop-up card that inspired me to make this version of my own.  I incorporated the fabulous "Groovy Love" stamp set as well as "On Film" framelits to create a window card......


 that opens to reveal a fun slider...... 


and a surprise message!


Using washi tape to bind the edges to make a pocket for the slider piece allowed a smooth sliding mechanism.  I had to plan where the window was placed in order to show off the hearts, so I cut out a template from scrap paper and used that for placement before carefully cutting out the window and using film strip negative as a border.  I neatened the reverse of the window with a second film piece (and to hide my imperfect cutting!).


Try this pop up slider mechanism for yourself: http://www.youtube.com/watch?v=iYS2WIEOEbQ 

Happy Stamping,

23 September 2014

Happy Hour Awning Card


I made this tropical card for a friend after seeing this awning card made by DandI93.  I also made it because the fabulous "Happy Hour" wood mount stamp set is currently a weekly deal, usually $51.95 now $38.96!
Happy Hour stamp set

Here are video directions for making the awning/ canopy card:  http://www.youtube.com/watch?v=50gU4pDzof0


I swiped ink onto my Whisper White background piece to create a vibrant sky, stamped my drink images in black, then stamped them again in colour onto a scrap piece of paper. I cut out the drink pattern and popped them on top of the original stamping using dimensionals.  The hula fringing I cut with my fringing scissors using the brown paper that comes packed in my Stampin' Up! orders.  Love a bit of recycling!

Stamps:  Happy Hour


Fringe scissors
Does this card make you feel summer-y?

Happy Stamping,


30 May 2014

Fun Flowers Frame


These flowers are aptly named "Fun Flowers" and are also super quick and easy with the "Fun Flowers" die for the Big Shot.  You can layer the flowers and use them flat, or shape them as I have here depending on your needs.  Cutting through multiple layers of cardstock and paper makes light work and I love how this has turned out.  I've popped this into a store bought 5" x 7" frame, I just took the glass out and replaced it with my creation.

Shop for supplies in my online store 

Cardstock:  Primrose Petals, Raspberry Ripple, Crisp Canteloupe, Whisper White, Crumb Cake
Ink:  Old Olive, Crumb Cake
Stamps:  Flowering Flourishes 131998 $42.95, Perfect Pennants (Occasions cat) 133227 $51.95
Acc:  Fun Flowers die 121812 $55.95, Banner Framelits dies (Occasions cat) 132173 $45.95, In Colour DSP stack 130137 $37.95, Faceted buttons 127555 $9.95, Large Pearls 125577 $8.95, Sequin Trim (Occasions cat) 132983 $8.95, Linen Thread 104199 $7.95, Multipurpose Liquid Glue 110755 $6.95


Happy Stamping,

02 April 2014

Easter Bunny Gift Bags


I saw a version of this super cute Easter Bunny bag here and wanted to make it STRAIGHTAWAY - so I did.  This uses our versatile Tag a Bag Gift Bags with just one simple cut to shape the ears, and a cotton ball tail.  Imagine this as Easter place settings, class favours or Easter gift bags.  You can fill it with edible goodies and this is also handy if you do non-chocolate Easter gifts.  I finished my bags off with stitched satin ribbon, a simple tag and a lovely flower made with the Petite petals punch.

Here's how I made these up:

Fold the bag in half lengthwise so you can see the slightly shorter serrated edge.

From the centre fold, cut a freehand curve for the ears.

Open the bag up again and you're ready to decorate and fill.  I used Tombow multipurpose adhesive for the tail.

Carefully gather the bag and tie, adjusting the ears to your liking.


Happy Stamping,

15 December 2013

Simple Favour Box with Flap


These favour boxes are simple to make and can hold a myriad of goodies - these ones are sized to fit individually wrapped teabags and a few flat choccies, perfect as a little piece of handmade goodness. The measurements I used are as follows:

Cardstock 4 1/8" x 9 1/4" 
Score along the long edge at 3 1/4", 4", 7 1/4" and 8".  On the short side, score 3/4" in from each side.

You can easily change the measurements to suit larger or smaller items, I've made a template with instructions to show you how.

Cardstock:  Coastal Cabana, Pacific Point, Island Indigo, Silver Glimmer paper, Crisp Canteloupe
Ink:  Island Indigo
Stamps:  Oh Goodie
Acc:  Pacific Point Chevron ribbon, Calypso Coral baker's twine,  1 1/4" scallop circle punch, 1" circle punch, small star punch (merry minis pack), 1 3/8" circle punch (optional), tombow liquid glue, dimensionals. 

Happy Stamping,

09 December 2013

Test Tube Favours for the Season of Style


How cute are these?  I used this template to make a single and a triple treat holder which reflects the joy and fun of gift giving.  I filled my tubes with various surprises:  Jelly Belly beans, mini M+Ms, hot chocolate mix (complete with marshmallows), reindeer noses (Maltesers with a Jaffa) and for the sugar-free option, loose tea leaves.  


Happy Stamping,

14 October 2013

Brown Paper Bag ~ Owl Favours or Treat Bags

I made these during my school holiday craft class from gusseted paper bags and they were a hit with the kids!
I used the instructions here as inspiration, changed the ear folding a bit from the original and then let my punches and framelits do the rest.  Imagine these as Christmas owls, baby owls - anything you can think of really.........


Feet:  Blossom punch

All items available in my online store.

Happy Stamping,

03 August 2013

Swallowtail Upcycled Giftbag


All of my Stampin' Up! orders come with brown paper used as a packing filler, so here's a fun way to upcycle that FREE craft material.  I folded the brown paper in half and stitched the sides together with my sewing machine to form a pouch.  I then stamped the lovely swallowtail butterfly on the front and accented it with a simple strip of core-dinations cardstock that I embossed with the alphabet press embossing folder then lightly sanded.  The "Around Array" stamp set provided a nice finishing sentiment for fast and sweet giftbags. To close i simply folded the top over to the back and closed it with a sticker.  I've put bags of licorice bullets in here, what would you put in yours?

Cardstock:  Primrose Petals Core'dinations, Whisper White
Ink:  Strawberry Slush, Bermuda Bay, Pistachio Pudding, Summer Starfruit
Stamps:  Swallowtail, Around Array
Acc:  Alphabet Press EF, 7/8" scallop circle punch, sanding block

A Round Array
Alphabet Press Textured Impressions Embossing Folder

Happy Stamping,

29 May 2013

Patio Party Easel Card


Have you tried Summer Starfruit?  This fresh colour makes a card stand out, as does the handy easel design.

Cardstock:  Summer Starfruit, Whisper White
Ink:  Summer Starfruit, Midnight Muse
Stamps:  Make a Wish
Acc:  Patio Party DSP, Ovals Collection Framelits, Flower trim, large rhinestones

Happy Stamping,

12 March 2013

Artisan Embellishment marries with More Amore

You may recall I posted earlier about my sister's wedding which featured the In Color "Pool Party".  I showed you how to make your own tinted pearls and use reinkers for dyeing fabric or paper flowers and now we have the fabulous Artisan Embellishment kit for just $16.95 in our current seasonal catalogue  which allowed me to create this beautiful layout.


I added a strip of DSP from the lovely co-ordinating More Amore DSP and one of the laser cut hearts as well.  Everything else is from the kit and I had enough left over for another page.  This layout is 8x8" and easily popped into a frame or mounted onto a 12x12 sheet.

Cardstock:  Pool Party
Acc:  Artisan Embellishment kit, More Amore DSP, linen thread, adhesive

Order your Artisan Embellishment kit whilst you can!  This kit will also suit black and white photos, here's another layout with the rest of the kit.


Cardstock:  Naturals Ivory
Acc:  Artisan Embellishment kit, Limited Edition DSP, linen thread, adhesive.

Happy Stamping,

13 February 2013

More Amore card + envelobox


How can you not feel the love when you see the new More Amore designer paper?  Here's a super pretty project with a box, rather than an envelope.  I finally got to use my heart framelits (yay!) to cut the window in the front that hints at the gorgeous-ness contained inside.......and the new paper doilies.......and the super cute petite curly label punch.........and the new two tone ribbon.........

Cardstock:  Real Red, Primrose Petals, Whisper White
Ink:  Black Staz On, Real red
Stamps:  Ciao, Baby  (NEW! 2013 seasonal catalogue), Papillon potpourri, Hearts a Flutter
Acc:  More Amore DSP,  Heart framelits, IC DSP stack (pool party), Paper Doilies, petite curly label punch (SAB freebie), Large scallop edgelit, delicate designs EF, large heart punch, elegant butterfly punch, two tone ribbon, dimensionals, adhesive rhinestones, acetate, Stampin' trimmer, Score board + metric plate.

Here is how to make the 2cm high envelo-box, which is super easy with the stampin trimmer and scoreboard.  This can be made from one piece of A4 cardstock and protects the card from being crushed and it can also be used as a keepsake box.

Take one sheet of A4 cardstock.  Measuring along the longest side, cut in half at 150mm.  This will give you one piece slightly wider than the other.  Take this piece and trim the other edge to 195mm.  Take the remaining piece and trim that one to 193mm.  

You will now have two pieces, (1) 150mm x 195 and (2) 147mm x 193.   The largest one is for the lid and this is the one that you will stamp (hard to see in photo) and cut your window in.  Score both pieces 2cm in on all four sides.  Stamp the largest piece and then cut a window.  Crease all folds and cut tabs by making single cuts up to the score line.  Do not cut off any cardstock, just cut a tab to be able to tuck under and adhere to form the box shape.  Assemble the top and the bottom using your preferred adhesive. 

Happy Stamping,

05 February 2013

For the Record Mini Album Kit


One of the new items available from the fabulous new seasonal catalogue is the "For the Record" Simply Scrappin' Layout Kit.  This kit shown above is perfect for fuss free memory keeping, with co-ordinated papers, embellishments and layout ideas but I decided to use the components to make this gorgeous 6x6" mini album to capture some memories of my son.

I used my own cardstock in matching Island Indigo for the base, and decorated the front with my own stamps.

How would you like to make your own album?  I have put together a kit using "For the Record" and included ribbon, cardstock, additional paper and instructions.  Now you'll have a great place to pop those back to school photos!  The album is suitable for a boy or a girl (my DD is waiting for her version).
So here's what you get:
  • Base cardstock, pre cut and prescored for album
  • Co-ordinating paper for matting, and decorating
  • A sheet of die-cut self adhesive accents
  • Ribbon
  • Instructions for album assembly and layout ideas
  • A handy dandy place for photos, that you made yourself
Cost:  $15.95 for the kit including postage Australia wide. 
Colour choice:  Island Indigo as pictured or Old Olive (it is the album base colour only) 
Adhesive is not included.  If you would like to add in any additional stamps or accessories to complete your album, just let me know.

This altered mini album kit is only available through me, so contact me today paperescape@optusnet.com.au or 0432370630 to place your order.


Happy Stamping,

14 December 2012

Candlelight Christmas Banner


Here is a simple banner that makes the most of my Candlelight Christmas DSP off cuts!  You could make the banner as long or as short as you like by varying the message.  The patterned paper needs little embellishment, just some champagne glimmer paper and ribbon.  I peeled the layers of glimmer paper apart (just peeled the backing off gently) to make it thinner and easier to punch.  I cut my A4 cardstock into 8 equal pieces 10.5cm x 7.4cm and handcut the bottoms into a flag shape.  The DSP strips are 4" wide. The ink is Cherry Cobbler and you may notice sponging around the letters to help it all tie in together. Fast and effective, don't you think?

Cardstock:  Early Espresso, Very Vanilla, Champagne glimmer paper
Ink:  Cherry Cobbler, Crumb Cake (sponging)
Stamps:  Morning Post, Joyous Celebrations
Acc:  Candlelight Christmas DSP, Mocha Morning DSP (retired), 2 3/8" scallop circle punch, 1 3/4" circle punch, dimensionals, rhinestones, Raspberry Ripple stitched ribbon.

Happy Stamping,

Related Posts Plugin for WordPress, Blogger...